背景
MoTouch 项目中的状态管理大部分是基于 MobX 的, 使用方法就不在这里说了,详见 MobX官网。
使用过的同学们都知道,当 Observer builder 里面某个 MobX 属性发生改变时,就会自动刷新 Observer 了。但我一直有个疑问,为什么数据不用进行显式的绑定,到底是在哪里进行绑定的?如何才能确定某个属性已经被正确监听了?带着这些疑问,我们一起学习下源码。
类结构分工
Atom
被观察对象
Atom 对象是由 xxx.g.dart 生成, 实际上,我们每标记一个 @observable 属性,在 .g.dart 生成 getter 跟 setter 及对应的 atom, 通过 _atom.reportRead() 和 _atom.reportWrite() 来触发 ReactiveContext 的数据绑定及分发。
1 | import 'package:mobx/mobx.dart'; |
1 |
|
Observer
0.3.8
项目最早是用 0.3.8 版本的,很有印象,Observer 其核心就是个 StatefulWidget 而已,一旦数据变化,内部通过调用 setState(), 触发 State 的刷新,从而触发 builder 的刷新。
1 | void invalidate() => setState(noOp); |
1.1.0
而到了 1.1.0 版本,Observer 的实现就有所不同了,不再是个StatefulWidget, 而是个 StatelessWidget了。主角是 elemtent , 核心通过
1 | void invalidate() => markNeedsBuild(); |
标记 当前 element 为 dirty, 在下一帧触发相应的 build 方法。
Reaction(ReactionImpl,Derivation)
被 Observer 持有,封装数据绑定,更新回调方法。Reaction.run 回调给 Observer
ReactiveContext
1 | final ReactiveContext mainContext = createContext(config: ReactiveConfig.main); |
是个巨大的单例,负责处理 Atom 跟 Reaction 的依赖关系, 及进行数据方法绑定、分发、解绑等逻辑。
数据流动过程
数据绑定
整个数据绑定过程,在 0.3.8 版本是发生在 Observer State 的 build 里面,而在 1.1.0 版本,是在 Observer Element 的 build 方法体内。
1. start tracking
在 ReactiveContext 单例记录当前的 derivation。1
2
3
4
5
6
7
8
9Derivation _startTracking(Derivation derivation) {
final prevDerivation = _state.trackingDerivation;
_state.trackingDerivation = derivation;
_resetDerivationState(derivation);
derivation._newObservables = {};
return prevDerivation;
}
2. reportObserved()
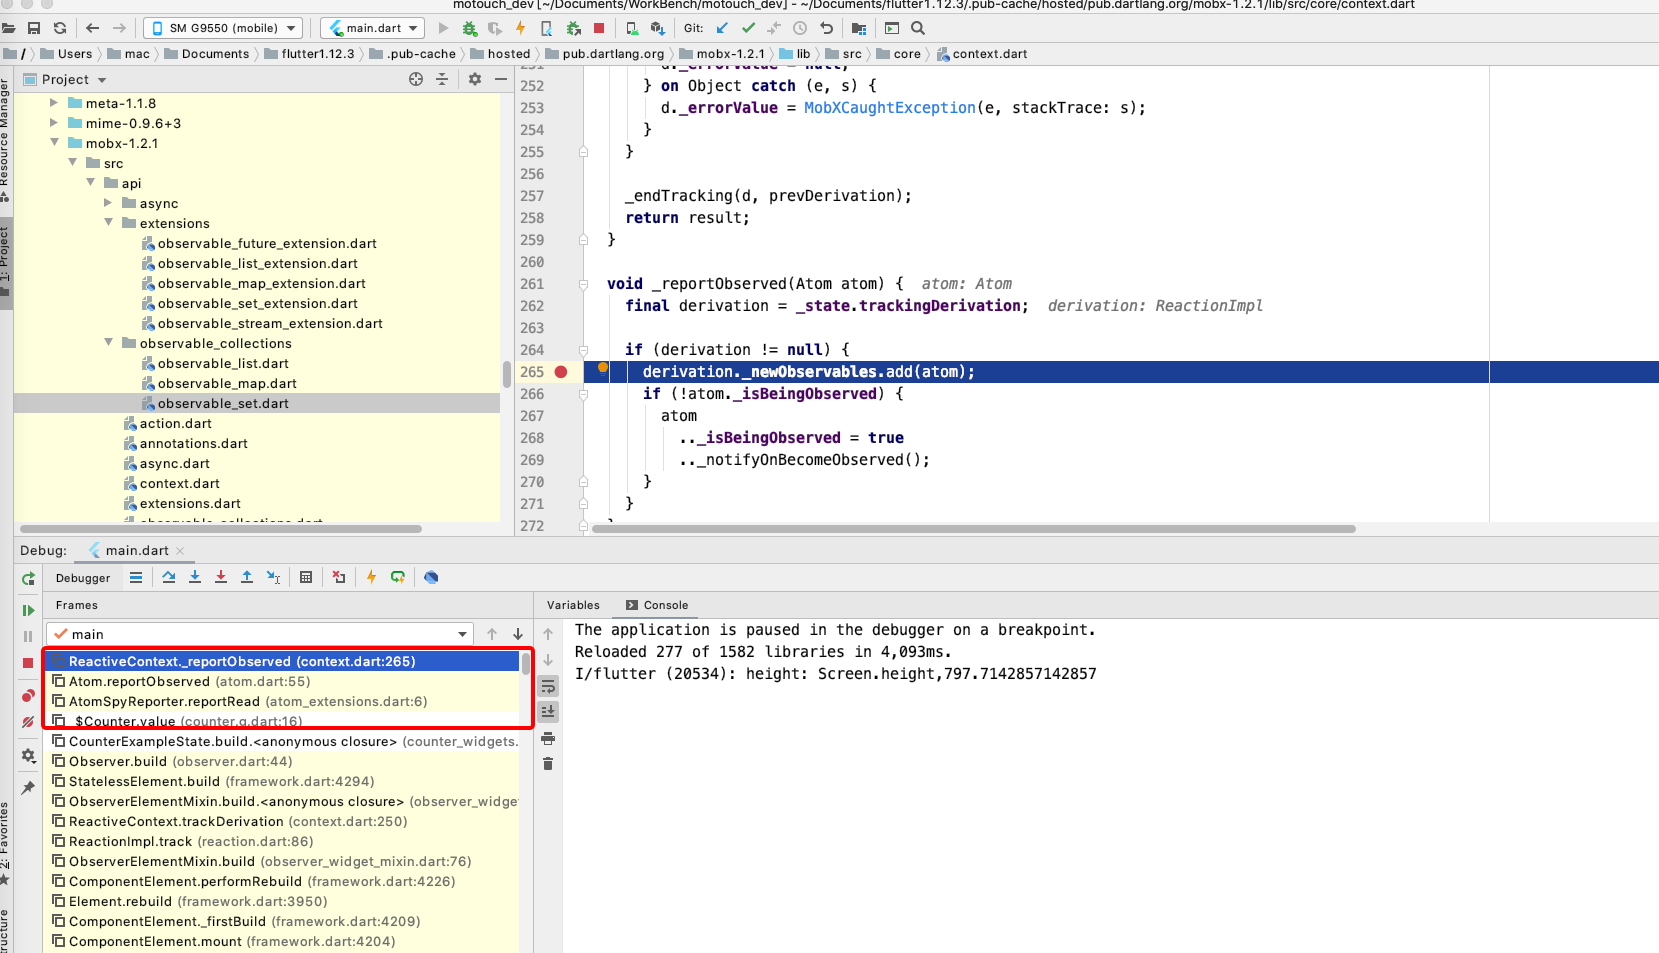
看堆栈可以知道,对于每一次 @Observable 对象的 get 调用,实际上是 atom.reportObserved() ,最终调用ReaciveContext 的 _reportObserved。
1 | void _reportObserved(Atom atom) { |
3. endTracking

把在 startTracking 跟 endTracking 之间, 所有被调用 reportRead() 的 atom, 绑定当前观察者 derivation 。
1 | void _bindDependencies(Derivation derivation) { |
数据更新
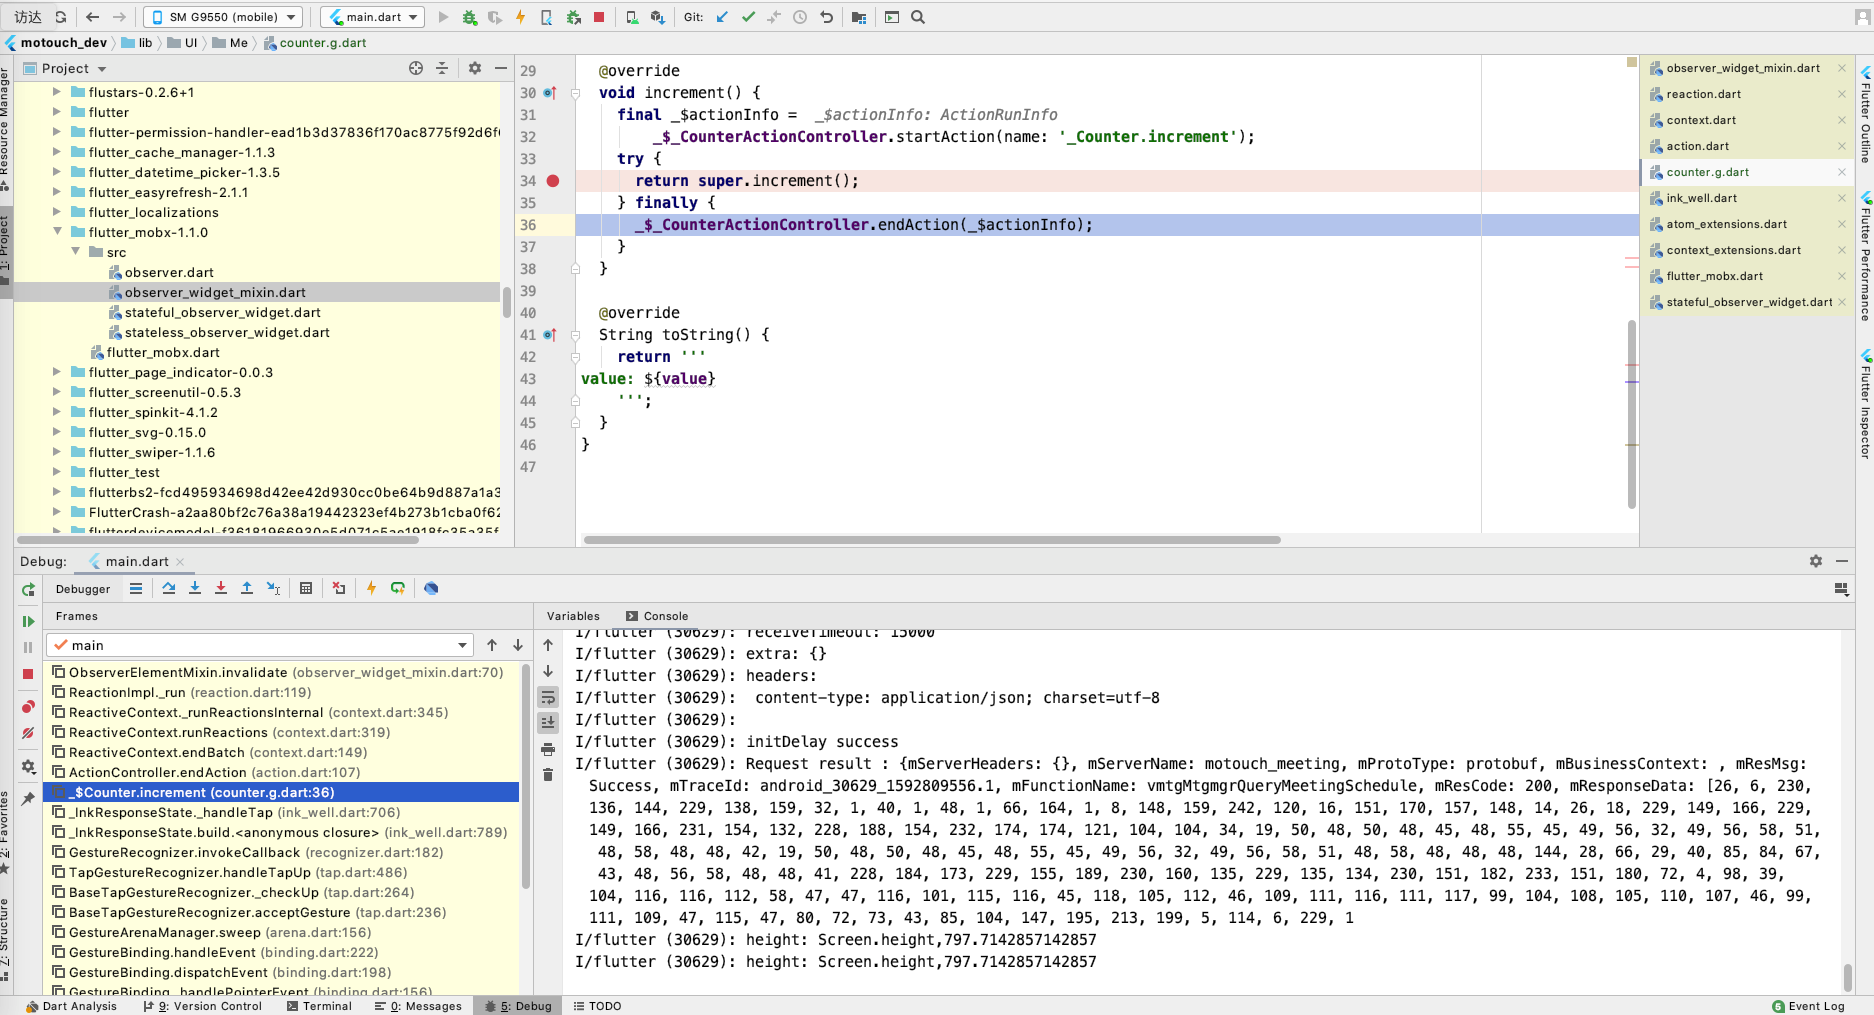
reportWrite()
当数据更新 atom.reportWrite() 主要做了这两件事:
- 更新 数据
- 把 与之绑定 derivation (即 reaction) 加到队列。
1 | void reportWrite<T>(T newValue, T oldValue, void Function() setNewValue) { |
1 | // 把 reaction 添加到队列, 这里 reaction 就是 ReactionImpl |
数据分发
@action
不带 @action
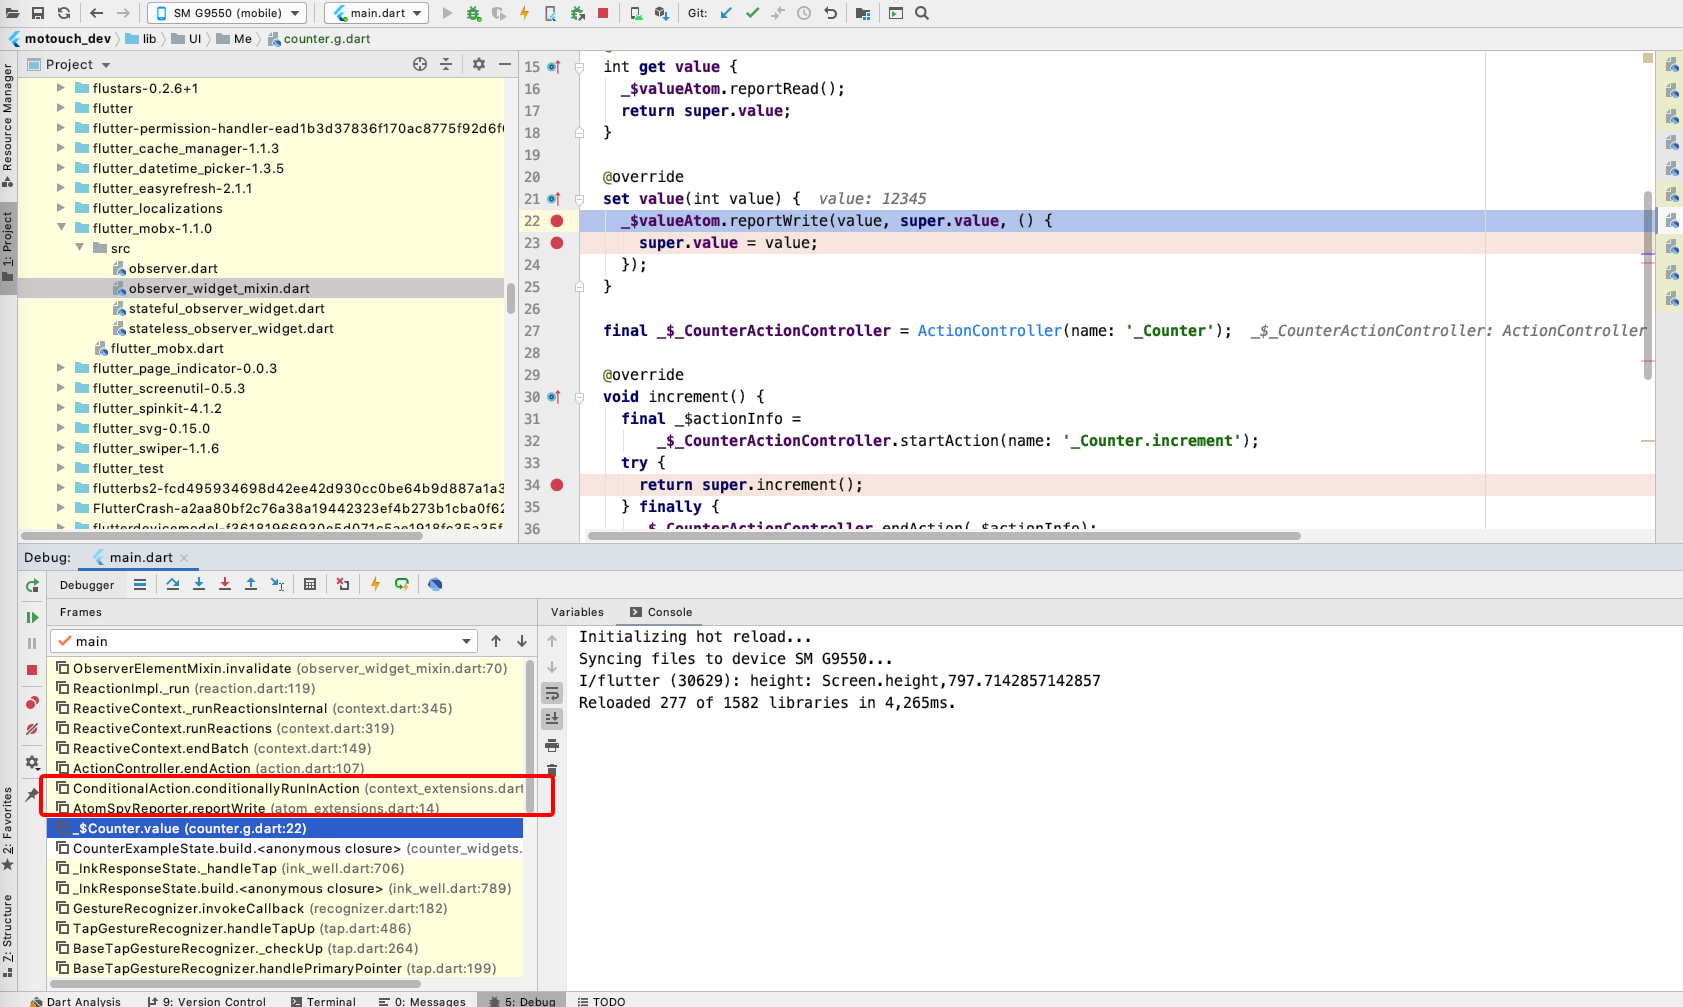
带不带 @action 的区别,其实就是 下面这个地方有没把 ActionController 传入来,数据流向其实是一样的,都会由 controller.endAction(runInfo); 来触发。
1 | void conditionallyRunInAction(void Function() fn, Atom atom, |
1 | void _runReactionsInternal() { |
最终触发 rebuild
0.3.8
1 | //observer.dart |
1.1.0
1 |
|
析构
因为 MobX 里面存在一个 ReactiveContext 单例,那就涉及到对数据的清除绑定了
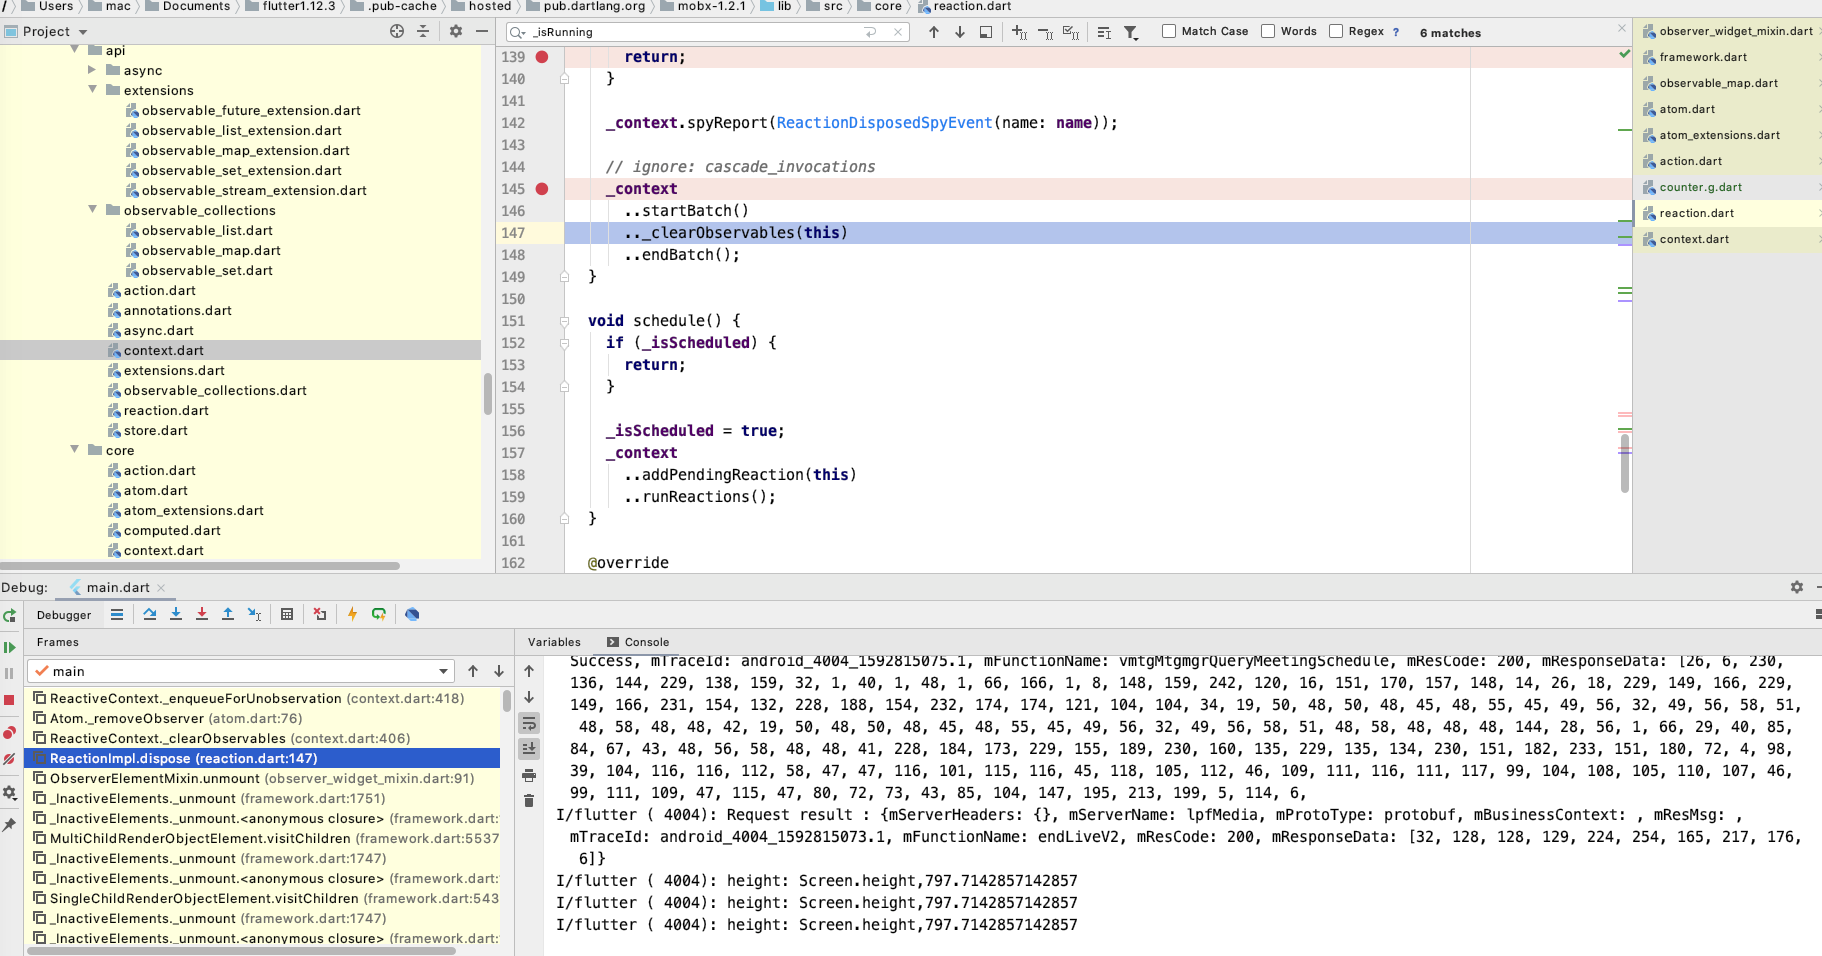
1 | void _clearObservables(Derivation derivation) { |
应用
在实际开发过程中,我们项目会遇到一些数据更新了,但没触发 Observer rebuild 的一些疑问,在弄清楚数据流向后,现在可以基本解决了。
Counter 还是用上文那个例子,我们这次是对其中MobX 提供的 ObservableMap 进行监听,意图监听 map 的增减操作。
1 |
|
分绑定分2种方式,我们先注释 bind 2,用 counter.uidVideoSizeMap绑定,看看打印结果:
1 | I/flutter (20534): 对 counter.uidVideoSizeMap 重新赋值 |
可见,bind 1 这种方式,增减元素是不会引起 Observer 的 rebuild 的。
再来看看注释 bind 1, 打开 counter.uidVideoSizeMap.length的结果
1 | I/flutter (20534): 对 counter.uidVideoSizeMap 重新赋值 |
bind 2 的方式,无论是重新赋值,还是增减元素,都能引起 Observer 的 rebuild 。
结合源码来分析,bind 1这种绑定方式:
1 | //counter.g.dart |
bind 2:
1 | //observable_map.dart |
可见, bind 1, bind 2两种绑定方式,决定了 reaction 的不同, bind 1 那种方式完全把 uidVideoSizeMap 当成普通类型来用了,压根没有把 ObservableMap 类型带给我们便利给用上。
ObservableList, ObservableSet 也同理。